Thursday, July 18, 2013

Stand Strong with Art

This was a project I did for my church's VBS. Our theme was Kingdom Rock, Kids Standing Strong for God. So as the "art lady" I chose several activities that were somewhat medieval that we could do in 20 minutes or less. This was on the day that  "Friends and Family helps us stand strong". We talked about who gave us our names and how some children were named for someone in their family or a close family friend. Some students were named after friends from the Bible too. They created their names similar to illuminated manuscripts. 

Once they were finished we pinned them to a king size flat sheet like bricks in a wall because walls "stand strong". The wall hung in our church the week after VBS and the following Sunday students could collect their names on the way out of mass. It is a great way to show how many children participated in VBS and for the parishioners  to see what the parish children are learning and creating during VBS through art. The children were so proud of the work they did and they loved find and see his or her name on the wall! 


Thursday, July 11, 2013

Summer Memories

I love Art Camp. I can teach anything I want with what ever I want.

This year one of the things we made were Memory Bottles. I discovered a book by that title and fell in love. The story is about a boy who's elderly neighbor has a mysterious shed. I love the illustrations of all the beautiful forms.

We used Cloud Clay with a form inside, such as paper cups or leftover yarn cones, just what ever I had that seemed to match the children's form. They coiled around the form to create the bottle and created a fancy "stopper" for the top (if they wanted to). Before the bottle was closed they put a memory inside. This could be done with his or her imagination ( a thought was caught in the bottle) or by writing the memory down on paper and sealing it in the bottle.

Once the bottle was dry-ish, which takes a little extra time because the moisture is trapped inside, they were painted with Acrylic Glitter medium mixed with liquid water color. 

The results were magical! I know that the students will remember this camp long after the bottle itself is gone!


Wednesday, July 3, 2013

Elevating the Arts


First let me say that I am not a lover of contests when it comes to art. I do not care for poster contests and trash art contests whose themes are often shallow and superficial. But this last spring break I read about a contest that truly inspired me. It was sponsored by Americans for the Arts and American Girl Doll and the directive was to create a collaborative work of art with students that shows how art is at the center of learning, or how art is valued in your school. Five volunteer fourth grade students served as our creative core and we started creating our mural installation.

 “Our mural is about how art is all around us.” Mallory explains to a teacher as we install our work in the library. “See how the seeds spread and turns into ideas? Art is like that. It is everywhere.”


Each of the balloons show an area of life that is effected by art. Our food, technology, design of clothing and maps, music marketing, religious imagery, and so much more.


The five 4th grade students who served as the creative core of our mural team agreed that they should include a quote to better explain the impact art has on our school and our world.

“Everything you can imagine is real! The idea (of Picasso's quote) matched our picture so well.” Olivia commented during the discussion about which quote to use.  “Art gives us so much freedom to think and dream of things no one has ever seen before. Plus, it is really fun!” 


Teachers often comment about how excited learners are when they have the opportunity to be creative and expressive in the classroom. With so many high-stakes tests, most schools are pulling out of the arts, but our school is committed to making sure our students are the best, the brightest and the most creative by supporting the arts program.

The national winner of the contest will receive $10,000 for his/her school, so it was a gamble I was willing to take with my time. But, like they say, "Many will enter. Few will win." We will have to wait until October to find out the results but we already feel like winners. The principal showed the installation on the morning video announcements and recognized our creative team for their efforts.


Wednesday, June 26, 2013

"You're My Hero!" Hero Portrait Quilts

This enduring theme was Heroes. I launched this unit with 4th grade to get them to look at character. At the time I taught this unit, our school had a group of students that were bused in from one of the toughest housing developments in the city. I targeted them, but I really wanted all my students to think about what made a "true hero". I wanted them to see that just because someone is famous or rich does not necessarily make them a hero. You know what I am talking about. A beautiful voice or face does not make you a hero, a beautiful soul and a giving heart does. How do you teach that?

Students made a list of people they thought were heroes. Then we came up with a definition of what a hero is, as directed by the students. Then they took another look at the list of people they had made. They were surprised to cross out their favorite celebrities and to add parents, neighbors, teachers, coaches.
Mom
Payton Manning
Dr. Martin Luther King, Jr

We created felt no-sew portraits by layering felt. They brought in or I printed images of the people they wanted to honor. When the quilts were assembled (I don't sew so we used tacky glue.) they hung for Youth Art (March) in the hallway that connects the Tennessee Tower (where our law makers have their offices) with the TN Capitol building (which they walk through every day that time of year). The smaller "quilts" contain coordinating paragraphs that match the portraits explaining who is depicted and why the student considered that person a hero. We were scheduled to take a field trip that March to visit the capitol and see the quilts installed but we were snowed out.


Saturday, June 15, 2013

Meet Abby Fabulous!

Meet my ewe, Abby Fabulous! That's her with the pink beehive hair-do. Isn't she absolutely fabulous?

Today is her birthday as she was born at the Renaissance Center in Dickson, TN at the Middle Tennessee Art Education Association Summer Workshop. Great Job, Andrea Steele!!
As you may have guessed I took the felting workshop today, which was one of three amazing art-making opportunities. Encaustic and mixed media where the other two offerings and I wish I could have done all of them! But, life is all about choices so let me share some of my "handy work" with you. 
So this is my teacher, textile artist and really fun lady, Troy Lacey. 

 Abby and her ewe buddies. Aren't they all so cute!! We made them with needle felting.

 This is my rock. Don't laugh. I can make another ewe with this rock once it is dry. We also made beads with wet felting. They are drying now in the AC vent. 
 This is a needle felted composition. I call it Mint-Chocolate Fa-ling-go. No, it's not a type-o, it is how my 4 year old says flamingo. Isn't that cute!
This is Kim's humming bird. I love how she made the wings pop out!

 This is what my beads will look like once they dry. I can't wait to go get some spacing beads! Fun!

 So here are some of the raw materials we used as well as some the books Troy shared with us. 


 The sponge was used under the felt so we could poke it with the very sharp needles, which magically connects the wool fibers to make quite a strong connection. Plus it is really fun (I know, "fun" and "cute" should be banned after this post but is was so...both!!). The needles are ridiculously sharp so don't look away or even talk too much or you will bleed all over your project. When I figure out how to safely do this with my elementary kiddos, I will let you know. In the mean time I will be looking for another felting class to take. Yes, Troy, you have created another addict!!


Wednesday, June 12, 2013

Triple X- eXtreme teXture eXperts

Here is a great Elements based lesson that I use with kindergarten but you could easily do it with pre-K or first. I have done texture plaques for year. It has been in the curriculum in some form or fashion for as long as I have been teaching and I have taught it a number of ways, but this year I found a way to get three times as much out of this unit, a win, win, win situation!


This book is a fun way to get young ones thinking about and looking at texture. It shows extreme close up of everyday items and asks you to guess what they are (the answers are in the back).

Then students pressed a variety or found objects and stamps into a slab of clay. I happen to know that my kindergarten teachers stash these lovelies away and use them as Mother's Day gifts from the children, so this year, I added a twist. I made the clay slabs the way I usually do, by rolling the whole 25lb bag to make a large round-ish cylinder and then slicing them like refrigerated cookie dough using the wire (about 5-6 inches across). I had the students start texturing in the middle, introducing radial balance. When they were finished, I cut a hole out of the middle using a uniformed cookie cutter shape. 


 We used the cut out shape to create a pendant the students could ware and take home after glazing.
And the K teachers put each child's picture in the whole to create an adorable clay frame that every mother would love to have. I just which I had thought about it last year when my own son was in kindergarten!!


Wednesday, June 5, 2013

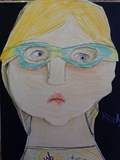
Red Grooms inspired Sculpto-pictorama Self Portraits!

Red Grooms was our Arts-tober artist of 2012 and all of the schools in our district were asked to create displays in October showcasing creations inspired by the artist and his process. The fact that he was a Nashville native was a big hit with the students, who knowing he is still living, expected him to drop in on our class or art shows at any time. I hope he does one day, how delightful would that be!!

I always start the year with Identity in 4th grade and this year was no different. I launched my unit but the results were anything but routine! What is identity? How do artists show identity? Why do artists create portraits of themselves and others? We discussed not only why artists created portraits but how they created them. We discussed and explored how the medium and mood spoke to viewers about the identity of the person portrayed. Then we explored Groom's process.


Student's drew their portraits in pencil and outlined them in Sharpie to use as a template.
Then it was cut out and traced onto a card stock. I used file folders because I had a ton and they had a good base skin color. You can make it darker and I have never seen a race lighter than a manilla folder. :)

Cut out the card stock outline and glue it down onto a stiffer board. I had a cash of matt board. Then add the eyes on a white paper. Cutting out the eyes was done by the teacher, a rotary blade does nicely. rolled and X in each eye as students were ready and they thought it was hilarious! They could get their scissors into the opening to cut out the eye shape, trace it onto the white paper and glue it down.

Next trace the face and "T" of the nose and brow onto the card stock and add color. We used colored pencils.


Finally you are ready to assemble. I love 3D-O's by Scratch Art. You can use the circles and then cut apart the webbing for more bang for your buck! I am very stingy with them and only allow 3-4 per layer.


Once it is all assembled, and this was my kiddo's favorite part, because of the gap between the eyes and the facial layer, the eyes seem to follow you! Stop swaying! It only works in person. ;)

Here is some student work !


This construction took about four weeks to complete and I see them an hour each week. In Arts-tober, all of the portraits went to the local Regal Cinema 16 in Green Hills for the 4th grade Art Show. Every 4th grader's portrait was on display that month. And appropriately spooky for October, as you walked through the show, every eye in every portrait followed you!